With the introduction of Mailchimp’s Two-factor Authentication, the Mailchimp login process has become a cumbersome task for some. You either have to check your email or the phone for the verification code. Although this can seem counterproductive, it’s quite a necessary feat to secure your leads.
Can you share your Mailchimp login details with others?
Whether you have hired an email marketing expert or your marketing team wants to access your Mailchimp account, you may be wondering how you can let them have access to your account. Even though it’s intuitive to think you should share your Mailchimp login details with them, you should refrain from doing that. To give access to other people to your Mailchimp account, you should create a new user inside your Mailchimp account with a specific role.
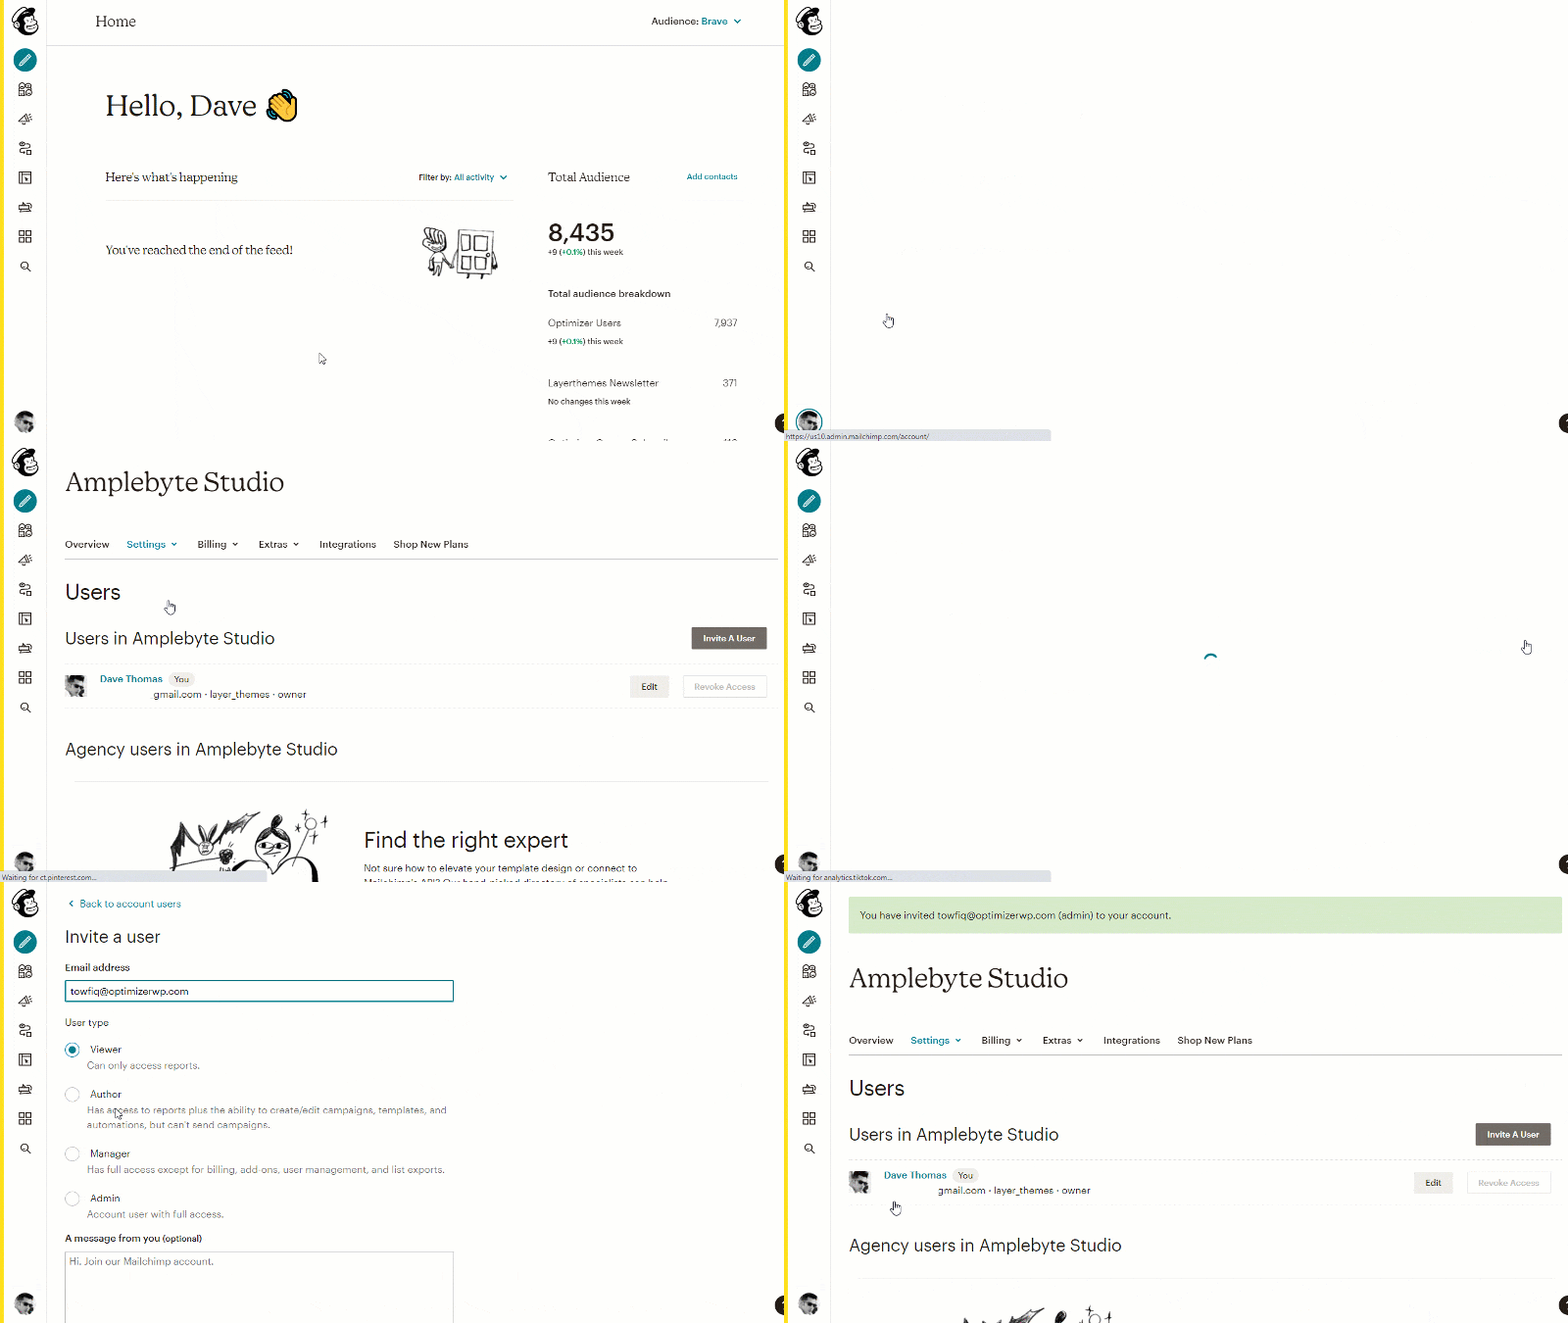
To create a new user account under your account in Mailchimp, follow these steps:

- First login to Mailchimp.
- When you are logged in, click the profile icon from the bottom left corner of the page.
- Click the Account Menu.
- Once you are on the Account page, click the Settings link.
- A dropdown menu will appear. Click the “Users” menu.
- Click the “Invite User” button.
- In the Invite Users screen, insert the person’s email address that you want to add.
- And select a specific role. This depends on what kind of activities they will be conducting in your account.
- Finally, click the “Send Invite” button.
- Once they get the invitation email and clicks the invitation link, they will be added to your account.
Bonus Tip: Grow your Mailchimp Lists ten-fold
If you are struggling with growing your Mailchimp list, there are few simple steps you can follow to boost your lead capture rate.
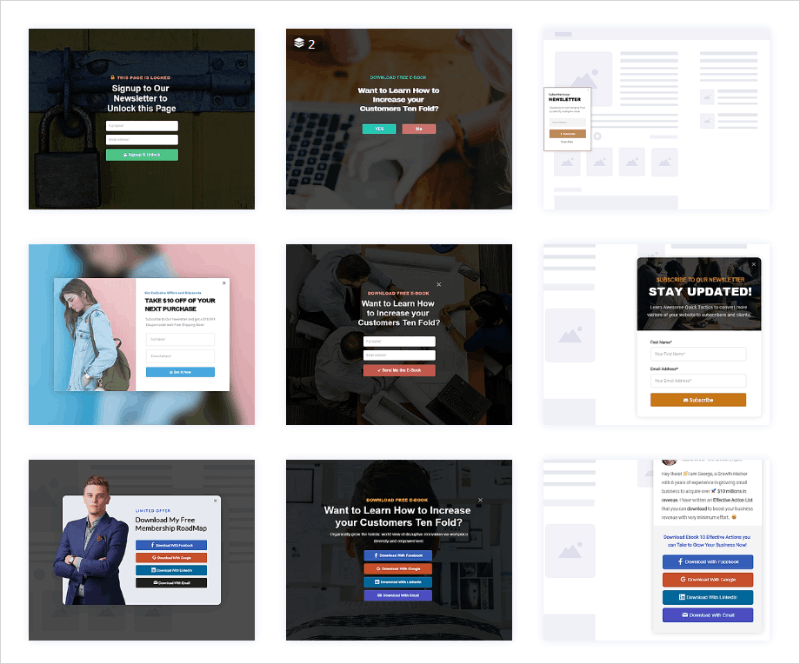
1. Instead of the generic Mailchimp optin popups that everyone uses, use a high converting Optin Form
If you are collecting leads from your WordPress website, you can install the Brave Conversion Engine plugin. With Brave, you can choose from hundreds of high converting opt-in forms and customize them to their needs.

2. Boost your Email Signup Form with Exit Intent Popups
It’s no secret that Exit Intent popups can grow your conversion by up to 800%. Exit Intent popups are displayed whenever the visitor tries to leave your website. It works because it triggers FOMO in visitors’ minds. Once you have created your opt-in popup in Brave, you can simply turn on the Exit Intent option.

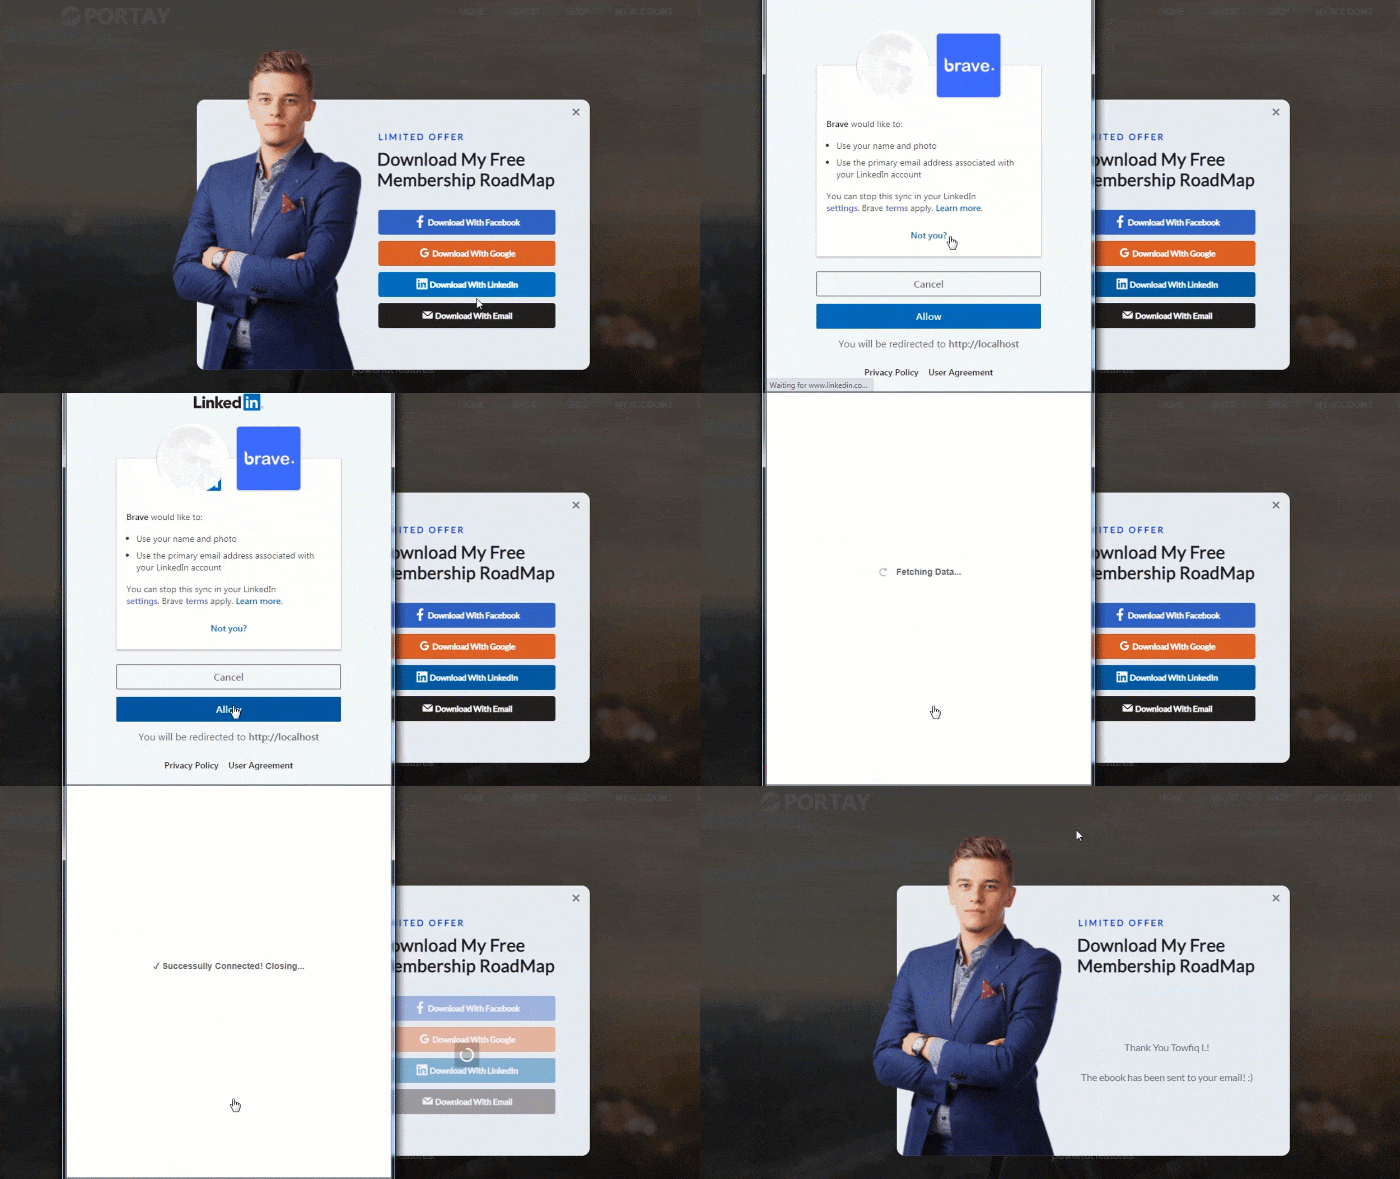
3. Let visitors signup with just a click

Most people do not subscribe to your email list because of their privacy concerns, but because they are too lazy to type in details. Which can be a very cumbersome experience on mobile devices. With Brave, you can let visitors signup to your email list with their Facebook, Google, or Linkedin accounts. They just click the “Subscribe with Facebook” button and voila, their email address is grabbed from the social account and immediately added to your Mailchimp list.

