+ Getting Started
+ Displaying the Campaign
- Campaign Settings
- Set who should see the Campaign
- Set When the Popup should be displayed
- Set Where the Popup should be displayed
- How to embed Brave Content inside Posts & Pages
- Schedule Popups to display on selected Dates/Days
- Opening a Popup On Click
- A/B testing Campaigns
- Display Dynamic Text inside Campaigns
- Creating Personalized Campaigns
+ Creating Forms
- Creating a Contact Form
- Creating a Newsletter Subscription Form
- Creating a Quiz Form
- Creating a multi-step Survey Form
- Saving Form Submissions in WordPress
- Inserting 3rd Party Forms instead of Brave Forms
- Let Visitors Download a file when they submit the Form
- Let Visitors Optin with their Social Accounts
- Send Automated Email Replies when someone submits the Form
- Conditionally Display Form Fields
- Connect your Form to Zapier
- Advanced Email Validation
- How to save form submissions in Google Sheets
- Track Form Submission with Facebook Pixel
+ Tracking the Campaign
- Setting up a Campaign’s Goal Tracking
- Brave Advanced Analytics
- Get Real-time Email Notification When a Campaign Goal is completed by a visitor
- Get Real-time Push Notification When a Campaign Goal is completed by a visitor
- Get Real-time SMS Notification When a Campaign Goal is completed by a visitor
- Track Campaign Goals with Google Analytics
+ Integrations
- Integrate AWeber
- Integrate ActiveCampagin
- Integrate Mailchimp
- Integrate GetResponse
- Integrate Hubspot
- Integrate Mailjet
- Integrate Mailer Lite
- Integrate Convertkit
- Integrate Campaign Monitor
- Integrate ConstantContact
- Integrate Moosend
- Integrate Sendgrid
- Integrate SendPulse
- Integrate Sendinblue
- Integrate Ontraport
- Integrate Klaviyo
- Integrate Pabbly
- Integrate Zoho Campaign & CRM
- Integrate Mailpoet
- Integrate The Newsletter Plugin
- Integrate Mailster
- Integrate Sendy
- Integrate Omnisend
- Integrate Fluent CRM
- Integrate Neverbounce Email Validation
- Integrate Zerobounce Email Validation
- Integrate Truemail Email Validation
- Integrate Facebook Login
- Integrate Google Login
- Integrate LinkedIn Login
- Integrate Google Recaptcha
+ Tutorials
+ Woocommerce
+ Developers
How to embed Brave Content inside Posts & Pages
With Brave PRO, You can create embed Optin Forms, Survey forms, Banner ads, Custom Product Catalog, Video gallery and a lot more and embed them inside your WordPress Posts & Pages. You can also insert them anywhere that accepts shortcode. To embed them inside your post/page, you will have to create “Content” inside Brave.
-
-
- First go to Brave > All Campaigns and click the + icon and then click the “New Content” and create your content from scratch or import from preset library.
- Save your Content and go back to “All Campaigns” screen.
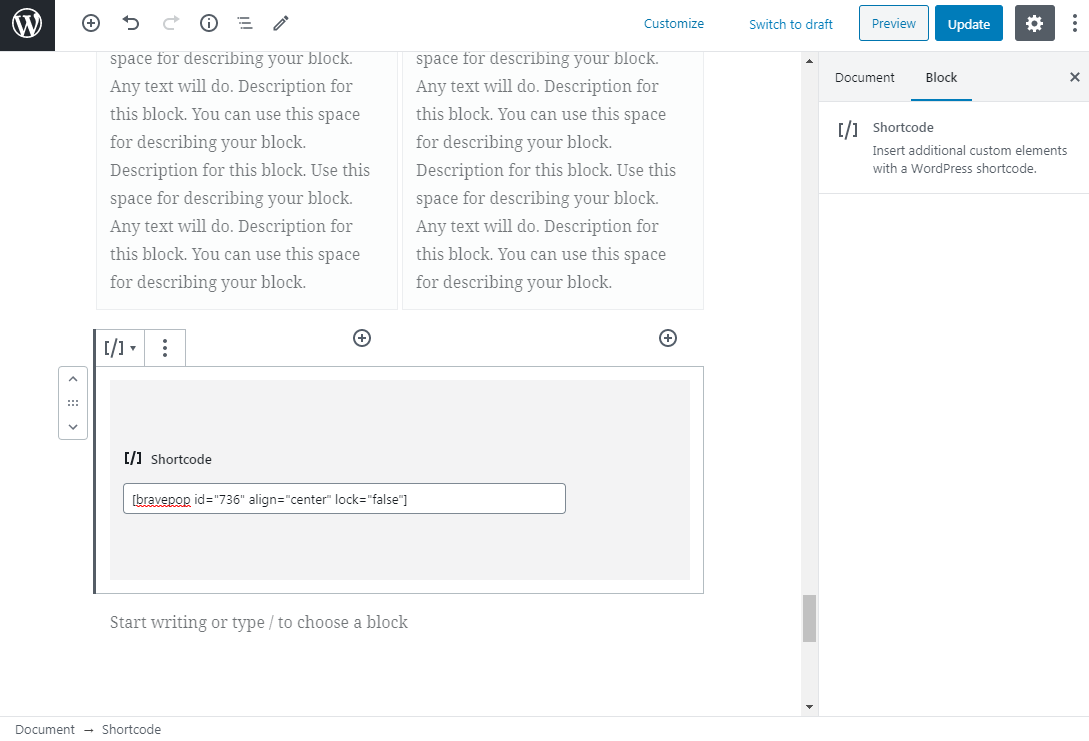
- Your content will display a shortcode field which will look something like this: [bravepo p id=”736″ align=”center”]
-
- Copy the shortcode and then go to your the post or page edit screen where you want to display the content and insert the shortcode inside a Shortcode Block

- You can customize the shortcode’s align value. To align the content to left or right, replace center with
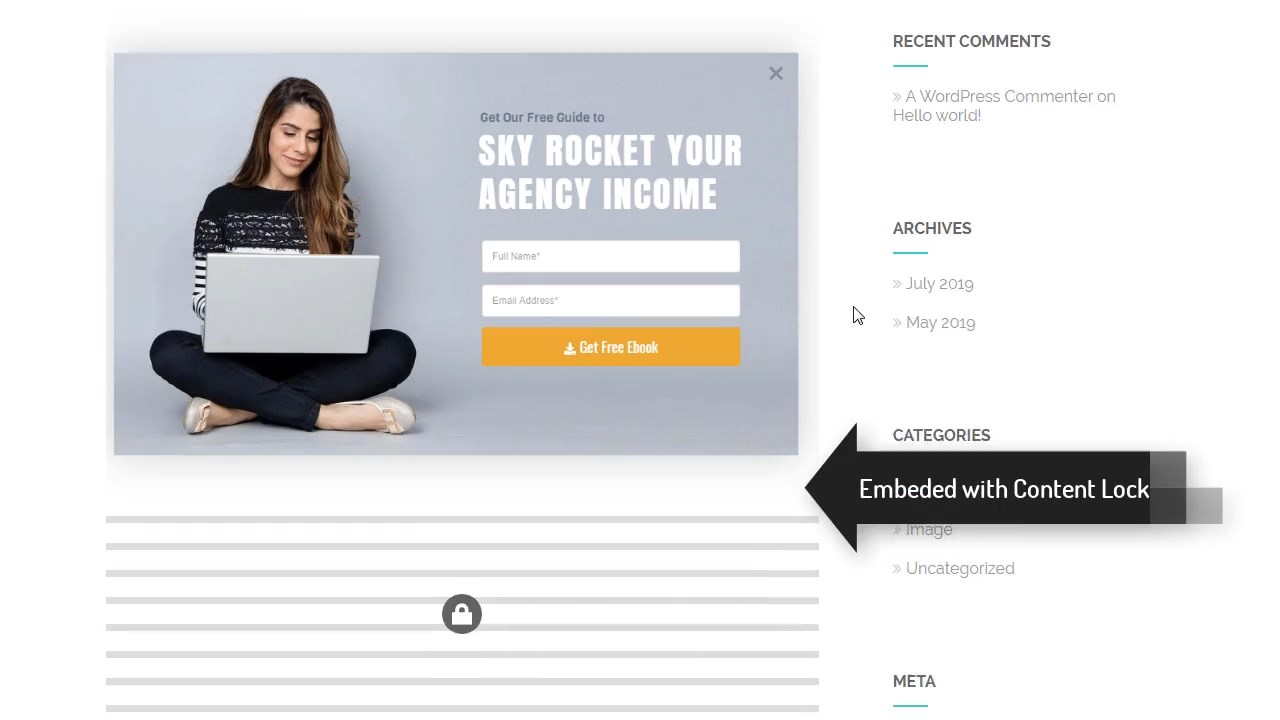
rightorleft. - If you wan to lock the content below your Brave Content so that the content becomes visible only after visitors, completes your campaign goal (clicks a button or submits a form), you can go to your Brave Content’s Settings screen and then enable the “Lock Content Below & Only Show When Goal is Completed” option. Then make sure you content has a goal set to it. Once you do that, your post/page’s content below the Brave content will be locked. It will only unlock when the goal is complete.

Displaying Content in your sidebar
To display the content like banner ads in your sidebar, You can paste the shortcode into a Text Widget. But make sure that the content width is not bigger than your Sidebar’s width. Usually, you should not make the content width more than 300px , if you want to display it in your sidebar.
Important
If you want to lock your content, make sure your content goal is set to either Click or Form Submission.
Automatically Embed Content Inside Posts or pages
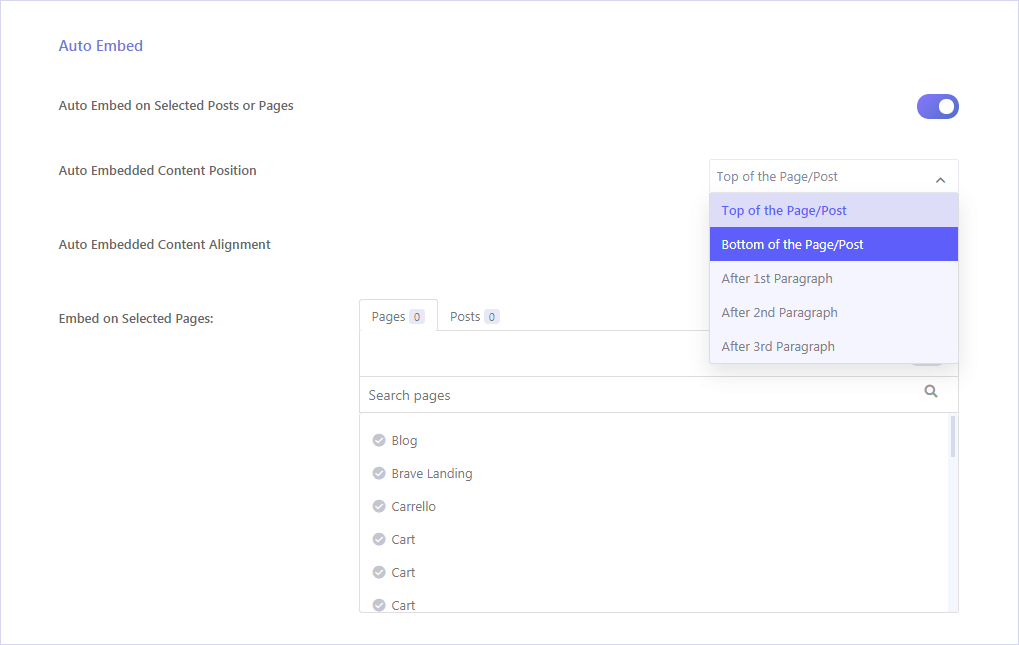
You can also automatically embed the Content you create with Brave inside posts or page with Auto Embed feature. You can embed inside specific posts or page and in specific locations including:
- Start of the Post/Page
- End of the Post/Page
- After 1st Paragraph
- After 2nd Paragraph
- After 3rd Paragraph

Most times its easier to embed with this method because once you don’t need to display the embedded the content, you don’t have to edit each posts and remove the shortcodes. You can simply deselect the selected page/posts location from the Campaign’s Auto Embed settings section and they won’t be shown on those pages anymore.
