+ Getting Started
+ Displaying the Campaign
- Campaign Settings
- Set who should see the Campaign
- Set When the Popup should be displayed
- Set Where the Popup should be displayed
- How to embed Brave Content inside Posts & Pages
- Schedule Popups to display on selected Dates/Days
- Opening a Popup On Click
- A/B testing Campaigns
- Display Dynamic Text inside Campaigns
- Creating Personalized Campaigns
+ Creating Forms
- Creating a Contact Form
- Creating a Newsletter Subscription Form
- Creating a Quiz Form
- Creating a multi-step Survey Form
- Saving Form Submissions in WordPress
- Inserting 3rd Party Forms instead of Brave Forms
- Let Visitors Download a file when they submit the Form
- Let Visitors Optin with their Social Accounts
- Send Automated Email Replies when someone submits the Form
- Conditionally Display Form Fields
- Connect your Form to Zapier
- Advanced Email Validation
- How to save form submissions in Google Sheets
- Track Form Submission with Facebook Pixel
+ Tracking the Campaign
- Setting up a Campaign’s Goal Tracking
- Brave Advanced Analytics
- Get Real-time Email Notification When a Campaign Goal is completed by a visitor
- Get Real-time Push Notification When a Campaign Goal is completed by a visitor
- Get Real-time SMS Notification When a Campaign Goal is completed by a visitor
- Track Campaign Goals with Google Analytics
+ Integrations
- Integrate AWeber
- Integrate ActiveCampagin
- Integrate Mailchimp
- Integrate GetResponse
- Integrate Hubspot
- Integrate Mailjet
- Integrate Mailer Lite
- Integrate Convertkit
- Integrate Campaign Monitor
- Integrate ConstantContact
- Integrate Moosend
- Integrate Sendgrid
- Integrate SendPulse
- Integrate Sendinblue
- Integrate Ontraport
- Integrate Klaviyo
- Integrate Pabbly
- Integrate Zoho Campaign & CRM
- Integrate Mailpoet
- Integrate The Newsletter Plugin
- Integrate Mailster
- Integrate Sendy
- Integrate Omnisend
- Integrate Fluent CRM
- Integrate Neverbounce Email Validation
- Integrate Zerobounce Email Validation
- Integrate Truemail Email Validation
- Integrate Facebook Login
- Integrate Google Login
- Integrate LinkedIn Login
- Integrate Google Recaptcha
+ Tutorials
+ Woocommerce
+ Developers
Inserting 3rd Party Forms instead of Brave Forms
With Brave you can insert any 3rd party form by inserting the shortcode provided by the plugin into a Brave’s “Code” element. Let’s take a Look on how you can insert Popular Form plugin’s form in your Brave Popups.
Contact form 7
Follow these steps to insert your Contact form 7 Forms in your Popup:
- After creating the form, from your WordPress dashboard, go to the Contact > Contact Forms and copy the Shortcode that is displayed beside your target Form. Eg: [contact-form-7 id=”527″ title=”Contact form 1″]

- Go to Popups > All Popups and click the Popup where you want to display the Contact form.
- When you are in the Popup Editor screen, drag and drop the “Code” Element from the left panel into your Popup.

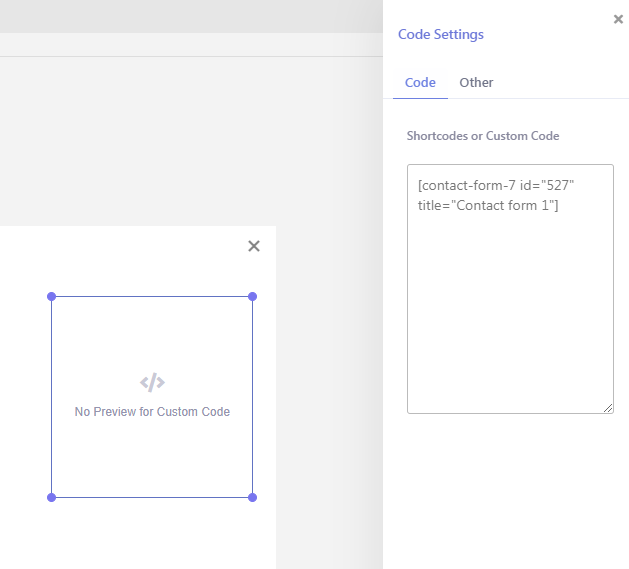
- Click the Code element to open its settings on right.
- In the “Shortcodes or Custom Code” paste the shortcode you just copied.
- Save the Popup settings.
Now the Popup will display the Contact Form 7 Form in your Popup.
You can follow the same steps to insert Ninja Forms, Gravity Forms, Formidable Forms, WPForms or any other type of 3rd party forms as long as they provide shortcodes.
if you want to update the popup conversion count when the form is submitted or get real-time notification, click the “Goal” tab from top and select the “Form Submission” from the Goal Completes when option. Then click the “Select” button and you will enter the goal selection mode. Select your Code Element and exit the goal selection mode. Now when the form is submitted, the popup conversion count will be automatically updated.