+ Getting Started
+ Displaying the Campaign
- Campaign Settings
- Set who should see the Campaign
- Set When the Popup should be displayed
- Set Where the Popup should be displayed
- How to embed Brave Content inside Posts & Pages
- Schedule Popups to display on selected Dates/Days
- Opening a Popup On Click
- A/B testing Campaigns
- Display Dynamic Text inside Campaigns
- Creating Personalized Campaigns
+ Creating Forms
- Creating a Contact Form
- Creating a Newsletter Subscription Form
- Creating a Quiz Form
- Creating a multi-step Survey Form
- Saving Form Submissions in WordPress
- Inserting 3rd Party Forms instead of Brave Forms
- Let Visitors Download a file when they submit the Form
- Let Visitors Optin with their Social Accounts
- Send Automated Email Replies when someone submits the Form
- Conditionally Display Form Fields
- Connect your Form to Zapier
- Advanced Email Validation
- How to save form submissions in Google Sheets
- Track Form Submission with Facebook Pixel
+ Tracking the Campaign
- Setting up a Campaign’s Goal Tracking
- Brave Advanced Analytics
- Get Real-time Email Notification When a Campaign Goal is completed by a visitor
- Get Real-time Push Notification When a Campaign Goal is completed by a visitor
- Get Real-time SMS Notification When a Campaign Goal is completed by a visitor
- Track Campaign Goals with Google Analytics
+ Integrations
- Integrate AWeber
- Integrate ActiveCampagin
- Integrate Mailchimp
- Integrate GetResponse
- Integrate Hubspot
- Integrate Mailjet
- Integrate Mailer Lite
- Integrate Convertkit
- Integrate Campaign Monitor
- Integrate ConstantContact
- Integrate Moosend
- Integrate Sendgrid
- Integrate SendPulse
- Integrate Sendinblue
- Integrate Ontraport
- Integrate Klaviyo
- Integrate Pabbly
- Integrate Zoho Campaign & CRM
- Integrate Mailpoet
- Integrate The Newsletter Plugin
- Integrate Mailster
- Integrate Sendy
- Integrate Omnisend
- Integrate Fluent CRM
- Integrate Neverbounce Email Validation
- Integrate Zerobounce Email Validation
- Integrate Truemail Email Validation
- Integrate Facebook Login
- Integrate Google Login
- Integrate LinkedIn Login
- Integrate Google Recaptcha
+ Tutorials
+ Woocommerce
+ Developers
Set When the Popup should be displayed
The Popup Placement settings can be accessed from each Popup’s settings Page. To access the Popup Placement settings Select an existing Popup from the WordPress Admin Dashboard > Popups and then when the Popup Editor loads, click the “Settings” menu from the top of the editor screen.
Displaying the Popup on Page Load
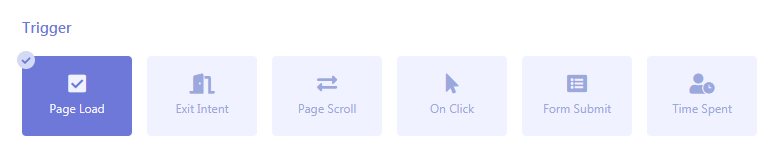
To display the Popup on page load, from the Popup’s Settings page, scroll down to the “Trigger” section and select “Page Load”. And save the Settings by clicking the “Save” button from the top of the page.
Now the popup will be displayed immediately after the whole page is loaded.
Displaying the Popup When the Visitor tries to Exit the Page (Exit Intent)
Exit Intent Popups are Popups that are displayed whenever a visitor ties to move away from your web page to another website or tries to exit the page by any other methods. Exit Intent Popups are great way to urge visitors to perform a desired action. Out of all other serving methods Exit Intent popups brings the most results.
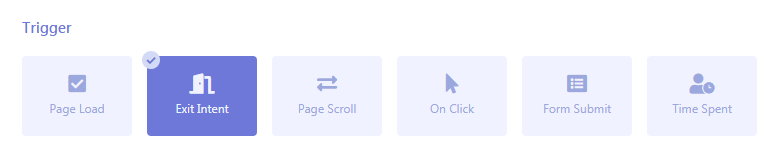
To setup Exit Intent Popup, From the Popup Editor Interface, click the “Settings” Menu from the top. Scroll down to Trigger Section and select “Exit Intent”.
Now when the Visitor Tries to exit the page, your popup will be immediately displayed.
Displaying the Popup When the Visitor Scrolls the Page
You can display the popup when the Visitor scrolls the page to a certain percent of the page or to a certain element.
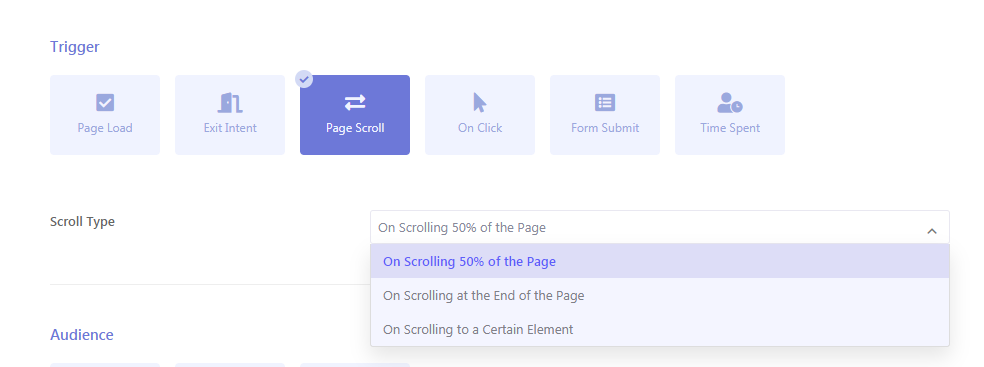
Click the “Page Scroll” option under the Popup’s Trigger Setting and you will see 3 scroll types.
- On Scrolling 50% of the Page: Selecting this option will display the Popup whenever visitors scroll to 50% of the whole page.
- On Scrolling at the End of the Page: Selecting this option will display the Popup whenever visitors scroll to the very end of the page.
- On Scrolling to a Certain Element: This option lets display the Popup when the visitor scrolls to a certain html element. To setup this option, first select the option from the Dropdown and then in the Element Class/ID field, insert your html element class name with dot at the start: ‘.mylement’. You can add multiple elements by commas between each element class name. You can also add elements by their html ids. To do that, insert element ids starting with a hash (#). Eg: “#myelementid”.
Displaying the Popup When the Visitor Clicks an HTML element inside the current Page
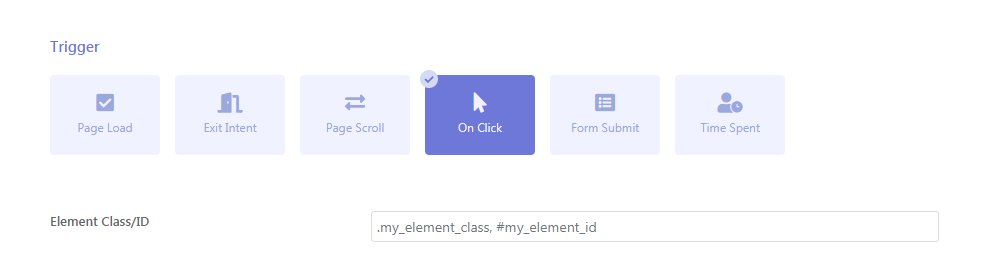
You can display the popup when the clicks a certain html like image, text, button etc. To setup this option, click the “On Click” option under the Trigger Settings Section.
Now in the in the Element Class/ID field, insert your html element class name with dot at the start: ‘.mylement’. You can add multiple elements by commas between each element class name. You can also add elements by their html ids. To do that, insert element ids starting with a hash (#). Eg: “#myelementid”.
Displaying the Popup When the Submits a form in the current Page
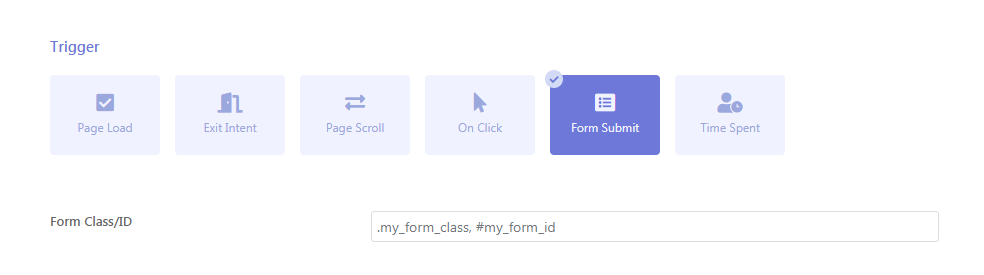
You can display a popup to the visitor after they submit a Form in the page. It can be any form. To set this up you need to first find the form id or class name and then click the “Form Submit” option under the Trigger Settings Section.
Now in the in the Element Class/ID field, insert your html element class name with dot at the start: ‘.mylement’. You can add multiple elements by commas between each element class name. You can also add elements by their html ids. To do that, insert element ids starting with a hash (#). Eg: “#myelementid”.
Displaying the Popup after the Visitor spends a certain amount of time on Page

You can display a popup after visitor spends a certain amount of time in the current page. To enable this option, click the “Time Spent” option under the Trigger Settings Section. A new option will appear where you can set the time. If you want to display a popup after 3 seconds, enter the 3 in the “seconds” field.
Now when a visitor enters the page and the page is fully loaded, the popup will be displayed after 3 seconds.