+ Getting Started
+ Displaying the Campaign
- Campaign Settings
- Set who should see the Campaign
- Set When the Popup should be displayed
- Set Where the Popup should be displayed
- How to embed Brave Content inside Posts & Pages
- Schedule Popups to display on selected Dates/Days
- Opening a Popup On Click
- A/B testing Campaigns
- Display Dynamic Text inside Campaigns
- Creating Personalized Campaigns
+ Creating Forms
- Creating a Contact Form
- Creating a Newsletter Subscription Form
- Creating a Quiz Form
- Creating a multi-step Survey Form
- Saving Form Submissions in WordPress
- Inserting 3rd Party Forms instead of Brave Forms
- Let Visitors Download a file when they submit the Form
- Let Visitors Optin with their Social Accounts
- Send Automated Email Replies when someone submits the Form
- Conditionally Display Form Fields
- Connect your Form to Zapier
- Advanced Email Validation
- How to save form submissions in Google Sheets
- Track Form Submission with Facebook Pixel
+ Tracking the Campaign
- Setting up a Campaign’s Goal Tracking
- Brave Advanced Analytics
- Get Real-time Email Notification When a Campaign Goal is completed by a visitor
- Get Real-time Push Notification When a Campaign Goal is completed by a visitor
- Get Real-time SMS Notification When a Campaign Goal is completed by a visitor
- Track Campaign Goals with Google Analytics
+ Integrations
- Integrate AWeber
- Integrate ActiveCampagin
- Integrate Mailchimp
- Integrate GetResponse
- Integrate Hubspot
- Integrate Mailjet
- Integrate Mailer Lite
- Integrate Convertkit
- Integrate Campaign Monitor
- Integrate ConstantContact
- Integrate Moosend
- Integrate Sendgrid
- Integrate SendPulse
- Integrate Sendinblue
- Integrate Ontraport
- Integrate Klaviyo
- Integrate Pabbly
- Integrate Zoho Campaign & CRM
- Integrate Mailpoet
- Integrate The Newsletter Plugin
- Integrate Mailster
- Integrate Sendy
- Integrate Omnisend
- Integrate Fluent CRM
- Integrate Neverbounce Email Validation
- Integrate Zerobounce Email Validation
- Integrate Truemail Email Validation
- Integrate Facebook Login
- Integrate Google Login
- Integrate LinkedIn Login
- Integrate Google Recaptcha
+ Tutorials
+ Woocommerce
+ Developers
Setting up a Campaign’s Goal Tracking
Popups are great way to convert visitors into potential customers. When you create a campaign, you create to achieve a certain goal. Setting a clear goal for a campaign helps you focus and track the objectives you are trying complete, be it, subscribing visitors to newsletter, collecting user feedback o increase product sales.
With Brave you need to set a goal to every popup to better track conversions and notify you when the visitors complete your popup’s objectives. To setup goal for a popup, after creating your popup, click the “Goal” menu from the Top of the Popup Editor screen. A menu will appear that holds all the options to setup and track the popup goals.
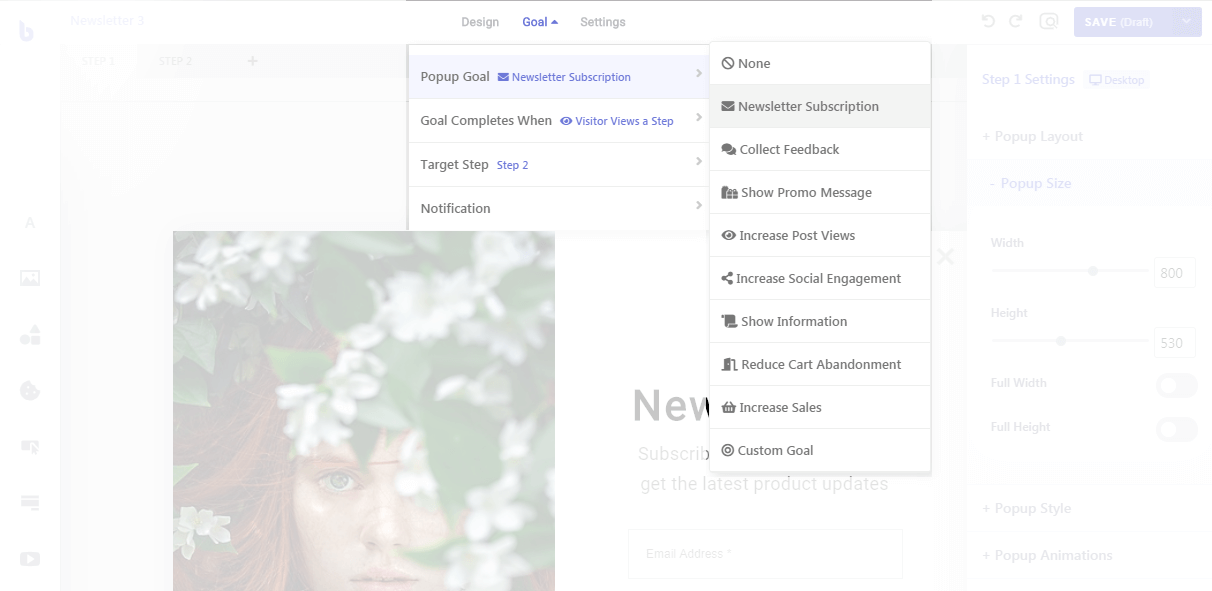
The first menu item “Popup Goal” lets you determine what you are trying to achieve with the popup by selecting one of the ready made goal objectives. Selecting this option is only for categorizing popups. Changing this option does not change anything in the Popup. When you set this option, you can easily look at it anytime and recall what the popup was set to do.
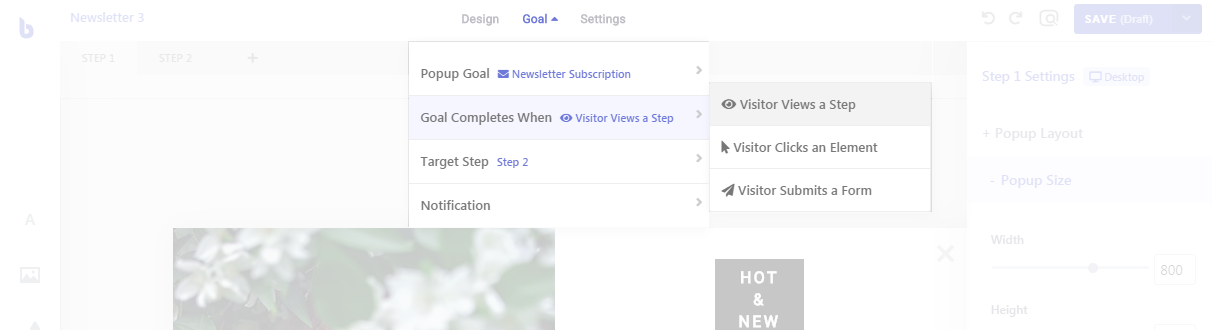
With Brave the Popup’s objective can be completed when visitor performs any of the 3 actions, depending on what you have selected:
- Viewing a certain step of the Popup (Default)
- Clicking an element in the popup (a button, image, text or shape)
- Submitting a Form in the Popup
By default, the goals are set to be completed when the visitor sees the first step. So the popup goal is marked as completed, whenever they see the Popup.
Completing a Popup Goal when a visitor sees a certain step of the Popup
If you want Brave to mark popup goal as complete for that visitor session when the visitor sees a certain step, you can do so by following these steps:
- First open the Popup Goal Menu from the Top.
- Then click the “Goal Completes When” menu.
- And then Select “Visitor Views a Step”.
- Now click the “Target Menu” option underneath.
- You will see all the steps of the current Popup.
- Select the step that you want the popup goal to be completed when the visitor sees it.
- Now when the visitor sees the selected step, the Popup goal will be marked for that session and it will be registered in the Conversion count for that Popup.
This method is an easy way of setting the Popup Goal. If your popup has multiple steps and the last step is a thank you step. You can easily set the last step and the popup goal will be completed, when the visitors gets to the “Thank You” step.
Completing a Popup Goal when a visitor clicks an element in the Popup
If you want Brave to mark a Popup’s goal as complete when a visitor clicks an element in the Popup, you need to
- First open the Popup Goal Menu from the Top.
- Then click the “Goal Completes When” menu.
- And then Select “Visitor Clicks an Element”.
- Then select the Target Element that you want the visitors to click to complete the goal. To do that, under the “Target Element” menu, click the “Select” button beside the word “Desktop”.
- You will enter the Goal Element Selection Mode.
- In this mode, you can select the element that you want the visitors to click to complete the goal. The elements should be clickable. All the clickable elements will start glowing when you are in this mode. You can only select one element as your Popup Goal. You can switch through all of your tabs and select the clickable element that you want to be the goal Element.
- Find a suitable glowing element and click it to make it the “Goal Element”.
- If your popup has custom mobile layout, you will need to do the same process for the mobile device too. To do under the “Target Element” menu, click the “Select” button beside the word “Mobile”. And then select the target element.
- Once you have selected the goal element for that popup, the Popup goal will be marked as complete when a visitor clicks your selected element.
- And in the “All Popups” screen, you will see the how many users completed the goal, under the “Conversion” column.
This is a great way to track sales popup or cart abandonment popup that only has one step. For example, if you are showing a Sales Popup that has a “Buy Now” button. You can select that button element to complete the Popup goal. So when a visitor clicks that button the Popup’s goal will be marked as complete.
The clickable elements that can be set as the target elements are:
- Text Element
- Button Element
- Image Element
- Shape Element
- Sticker Element
- Posts Element (When user clicks one of the posts)
- Products Element (When a product is added to cart)
Completing a Popup Goal when a visitor submits a form in the Popup
If you want Brave to mark a Popup’s goal as complete when a visitor submits a form in the Popup, you need to
- First open the Popup Goal Menu from the Top.
- Then click the “Goal Completes When” menu.
- And then Select “Visitor Submits a Form”.
- Then select the Target Element that you want the visitors to click to complete the goal. To do that, under the “Target Element” menu, click the “Select” button beside the word “Desktop”.
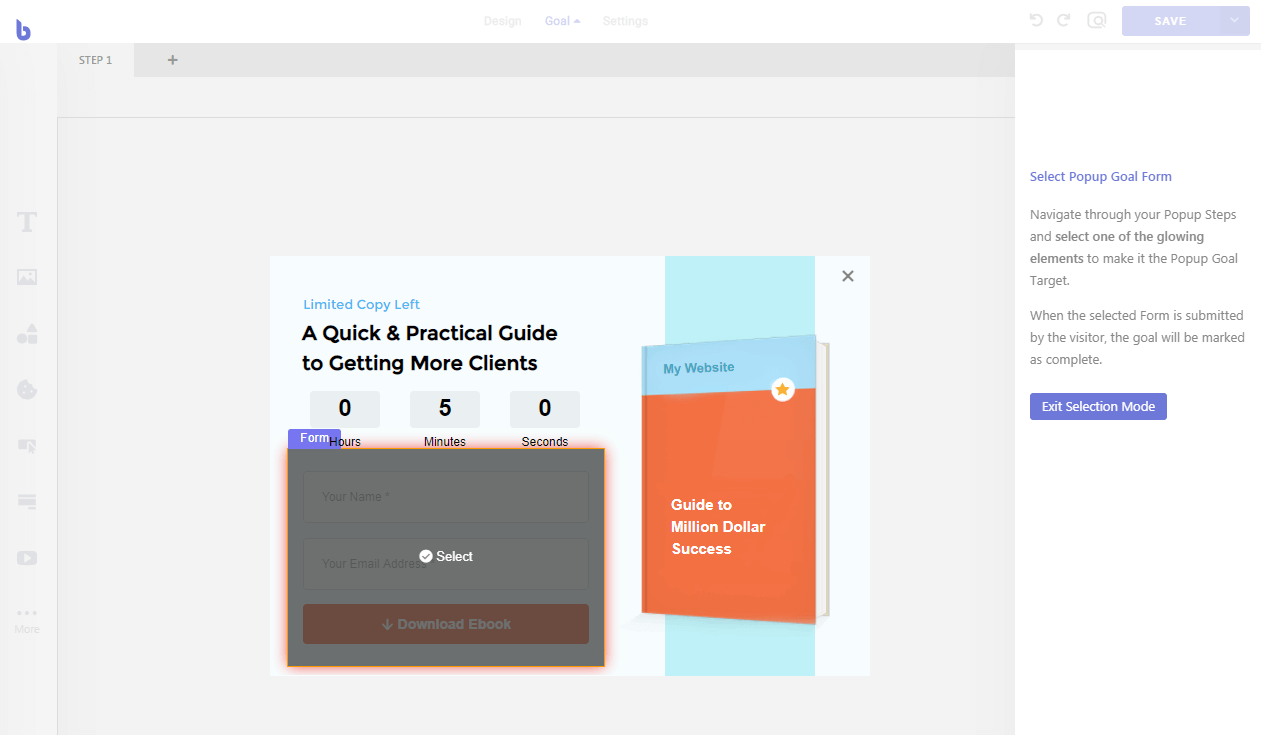
- You will enter the Goal Element Selection Mode.
- In this mode, you can select the form element that you want the visitors to click to complete the goal. All the form elements of your popup will start glowing when you are in this mode. You can only select one form as your Popup Goal. You can switch through all of your tabs and select the form that you want to be the goal Element.
- Find a suitable glowing form and click it to make it the “Goal Element”.
- If your popup has custom mobile layout, you will need to do the same process for the mobile device too. To do under the “Target Element” menu, click the “Select” button beside the word “Mobile”. And then select the target form.
- Once you have selected the goal element for that popup, the Popup goal will be marked as complete when a visitor submits your selected form.
- And in the “All Popups” screen, you will see the how many times the Popup goal was completed, under the “Conversion” column.
This is a great way to track newsletter subscription popup or feedback collection popup or any other type of popup that has a form in it. For example, if you are showing a popup to subscribe visitors to your newsletter. You can select the subscription form element to complete the Popup goal. So when a visitor submits the form, the Popup’s goal will be marked as complete and you can optionally get real-time notification.
The Form submit elements that can be set as the target elements are:
- Form Element
- Login Element
- Code Element (Your inserted code must render a form inside the popup)
To receive real-time email notification when a visitor completes a goal, read this Email Notification Documentation.