+ Getting Started
+ Displaying the Campaign
- Campaign Settings
- Set who should see the Campaign
- Set When the Popup should be displayed
- Set Where the Popup should be displayed
- How to embed Brave Content inside Posts & Pages
- Schedule Popups to display on selected Dates/Days
- Opening a Popup On Click
- A/B testing Campaigns
- Display Dynamic Text inside Campaigns
- Creating Personalized Campaigns
+ Creating Forms
- Creating a Contact Form
- Creating a Newsletter Subscription Form
- Creating a Quiz Form
- Creating a multi-step Survey Form
- Saving Form Submissions in WordPress
- Inserting 3rd Party Forms instead of Brave Forms
- Let Visitors Download a file when they submit the Form
- Let Visitors Optin with their Social Accounts
- Send Automated Email Replies when someone submits the Form
- Conditionally Display Form Fields
- Connect your Form to Zapier
- Advanced Email Validation
- How to save form submissions in Google Sheets
- Track Form Submission with Facebook Pixel
+ Tracking the Campaign
- Setting up a Campaign’s Goal Tracking
- Brave Advanced Analytics
- Get Real-time Email Notification When a Campaign Goal is completed by a visitor
- Get Real-time Push Notification When a Campaign Goal is completed by a visitor
- Get Real-time SMS Notification When a Campaign Goal is completed by a visitor
- Track Campaign Goals with Google Analytics
+ Integrations
- Integrate AWeber
- Integrate ActiveCampagin
- Integrate Mailchimp
- Integrate GetResponse
- Integrate Hubspot
- Integrate Mailjet
- Integrate Mailer Lite
- Integrate Convertkit
- Integrate Campaign Monitor
- Integrate ConstantContact
- Integrate Moosend
- Integrate Sendgrid
- Integrate SendPulse
- Integrate Sendinblue
- Integrate Ontraport
- Integrate Klaviyo
- Integrate Pabbly
- Integrate Zoho Campaign & CRM
- Integrate Mailpoet
- Integrate The Newsletter Plugin
- Integrate Mailster
- Integrate Sendy
- Integrate Omnisend
- Integrate Fluent CRM
- Integrate Neverbounce Email Validation
- Integrate Zerobounce Email Validation
- Integrate Truemail Email Validation
- Integrate Facebook Login
- Integrate Google Login
- Integrate LinkedIn Login
- Integrate Google Recaptcha
+ Tutorials
+ Woocommerce
+ Developers
Integrate Facebook Login
Brave PRO allows you to create Social Optin Popups that lets you use visitors Facebook account email with one click without them having to type in their email address. This increases optin conversion rate by a lot. Brave also lets your visitor signup on your WordPress website as a new user with Facebook. To do all these, you need to first create a Facebook App and connect your App to Brave. To do that, follow these steps:
Step 1: Go to Facebook’s Developer website and signup as a developer: https://developers.facebook.com/apps/
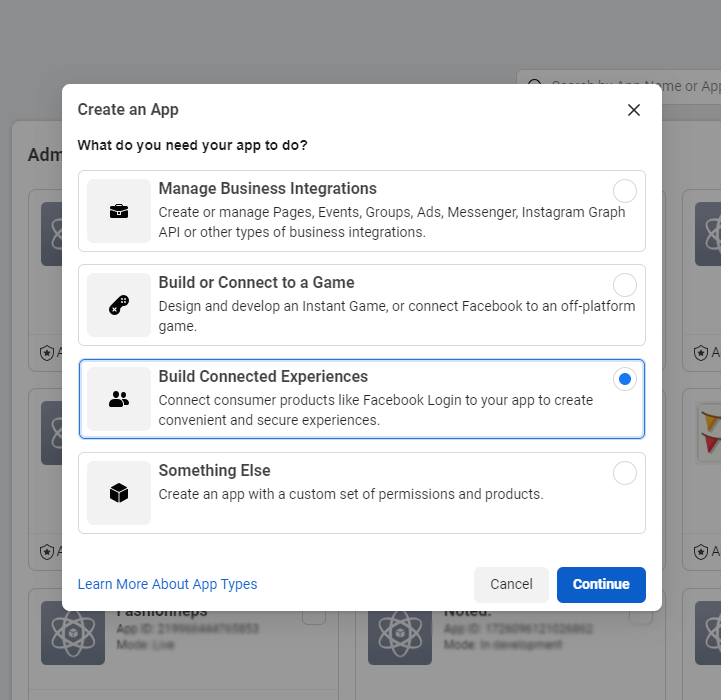
Step 2: Once you signup you will be asked to create an APP ID. On the first screen, you will be asked to select the Type of your App. Select Build Connected Experience.
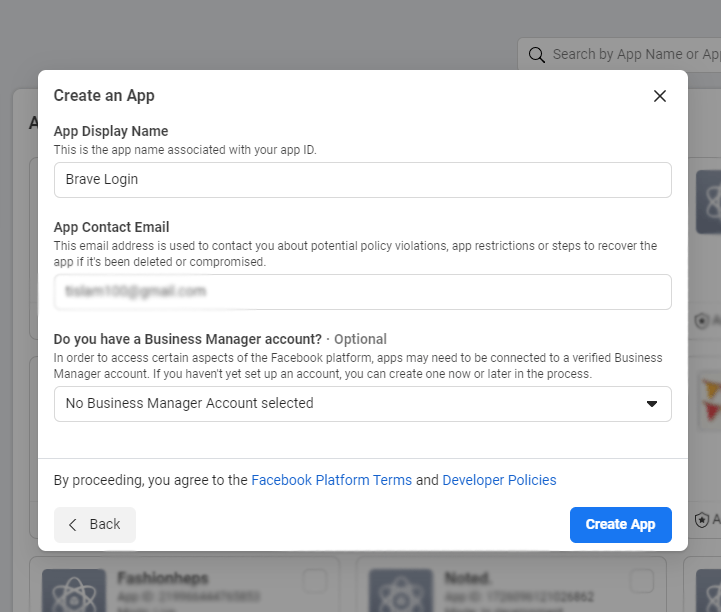
Step 3: Write down your App Name and insert your email address and click the Create App Button.
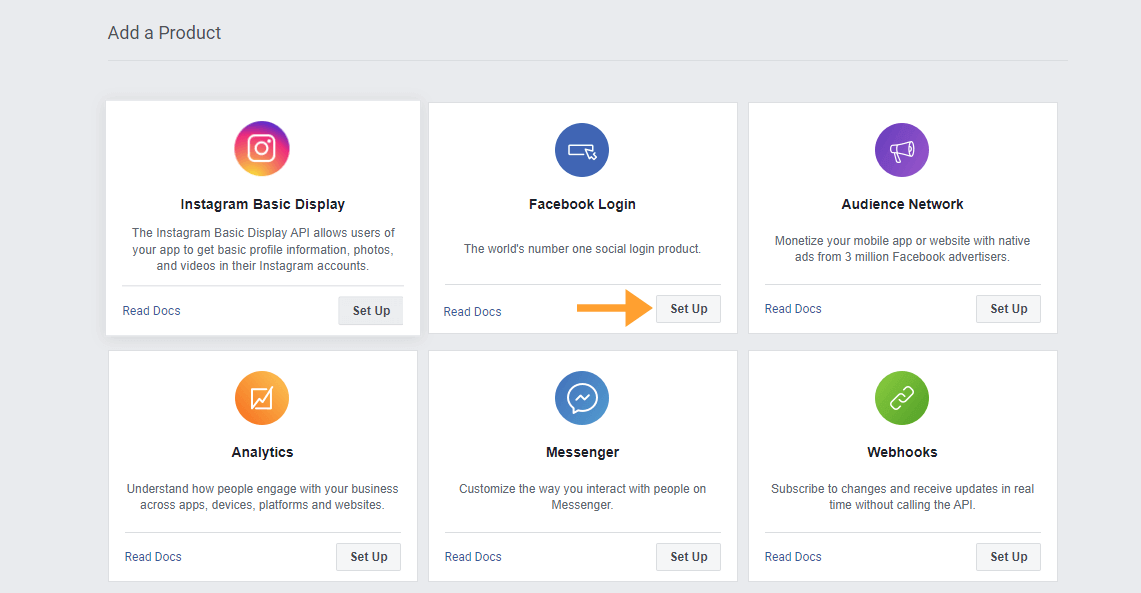
Step 4: Once the App is created, you will be taken to your App Dashboard page. From the “Add a Product” section of this page, click the Step Up Button inside the Facebook Login box.
Step 5: From the Second screen, click the “Web” button.
Step 6: Now on the next screen, Inside the “Tell Us about your website” section, insert your website address. and Click Save.
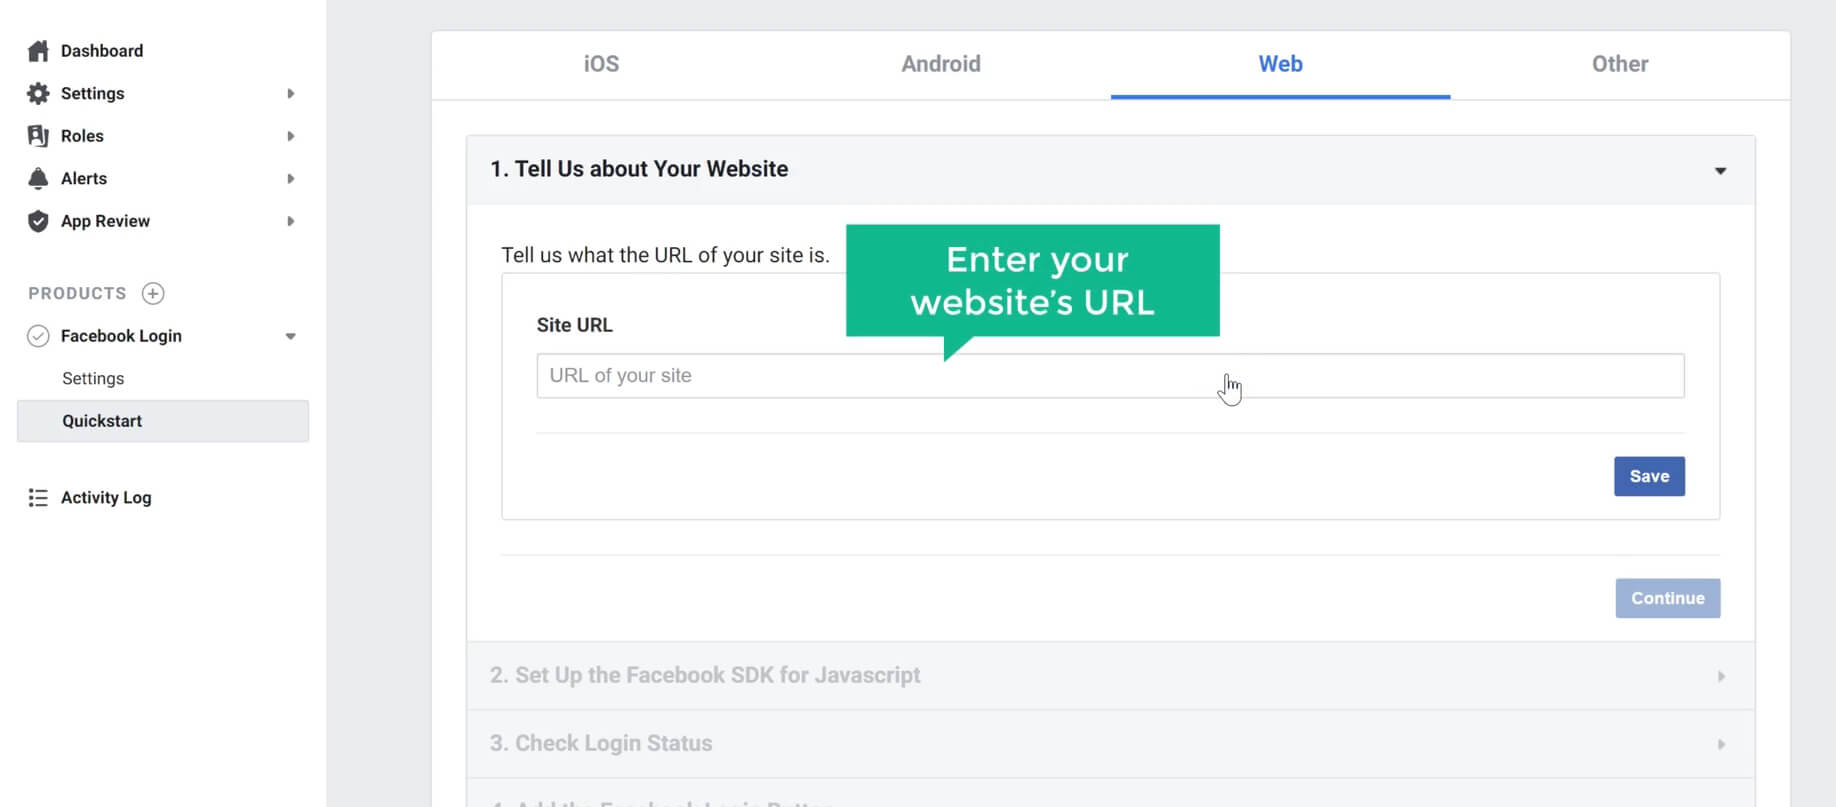
Step 7: Once you have added the URL, click the Basic menu under the Settings menu on left.
Step 8: On this screen, insert your website’s Privacy Policy URL, Terms of Service URL and add your logo as your App Icon. In User Data deletion field You will also have to insert your Contact page URL where users can request to remove their data. Finally set the Category and click the “Save Changes” button below.
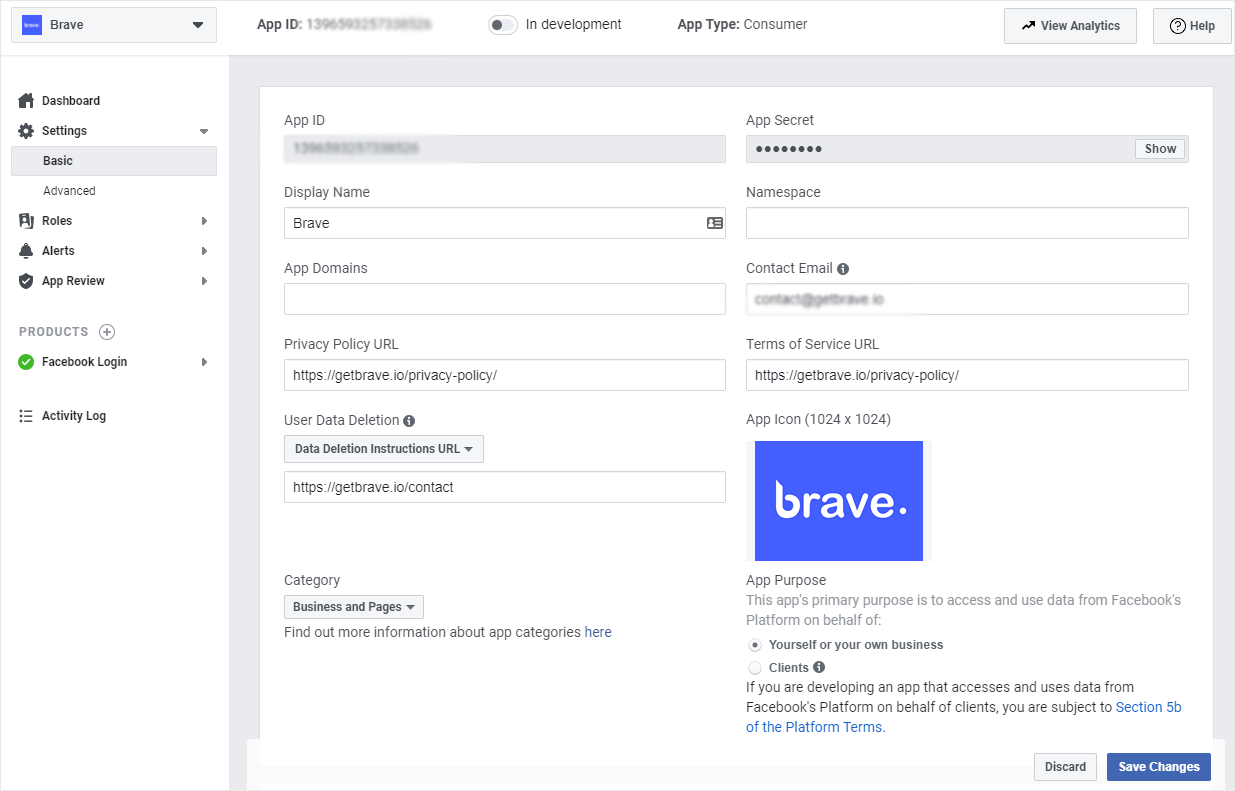
Step 9: From the top of the page, toggle the “In Development” button to publish your App.
Step 10: Copy the App ID from this page, and paste it in Brave > Integrations > Social > Facebook > Facebook APP ID field, and click Save to complete the Integration.
